Monday, April 26, 2010

Upload: April 26th, 2010


Shell balls from West Elm.


About 3 times a week,,,,I upload all the photos from my Iphone and my point and shoot camera onto my laptop.........Everything from job site photos, project sourcing, construction details, beautiful flowers, to big box store finds.  To give you an example, I'll back track a little bit here and post some of the most interesting or inspiring shots I've uploaded over the past 3 weeks, sometimes I take hundreds of photos in one day, it becomes an overwhelming task to sort thru regularly and keep only the relevant ones.  Have a look....


The first sign of warm weather to come was all the shells I spotted in the stores, they're everywhere right now!

West Elm.


Its all about gigantic, huge, shells this year.  Pottery Barn.


Flowers I bought on Good Friday.  The next morning, the Hydrangea were dead, of course......


On a shopping trip to buffalo I picked up this big beautiful cookbook for $9.  Yes, I bought it just because it was beautiful looking, like everything Martha does.  Not only does it make a nice book for display, but its actually a good basic cookbook, its got every "how to..." you could imagine.


At the framers, I was selecting some mat board and moulding for some antique botantical prints for a client.


Then we added this hand drawn detail called a French line.


Working late one Sunday night at my dining room table...


At a clients house to meet carpet installers.  Here's one of the staircases before...(actually 2 days before the treads were an orangey gold oak).


The after....a new wool runner with canvas bound edge.


Love the handles on the Fischer Paykel fridge I saw at Lowes.


I was impressed by how many styles of medicine cabinets I found at Lowes.


Another nice find at Lowes.....french style bathroom accessories. (i had just bought similar ones for a client at Kitchen Stuff Plus, slightly less$).


I liked this series of bathroom hardware, again at Lowes,,,,,,,I love the classic style and the fact it was nin polished nickel, not often found at a big box store.  Check out the co-ordinating toilet tank handle!! 


I can't understand why they make re-sealable potatoe chip bags?? I have no use for this feature.  Doesn't everyone eat the entire bag.....


A slipcover host chair I spotted at Union Home, I'm considering a pair for a chef's home kitchen I'm designing right now, co-incidentally this line is from the Paula Deen collection.


I just love this Ikea rug......but have no where to use it right now. : (


Fringe........

Its all about the fringe right now.  I bought some of these for clients.  Throw blankets from Union Home


One evening while the picture hanger was installing this gallery wall....


the homeowner and I enjoyed a glass of this - its fantastic!  I highly recommend.


Spotted this shiny brass light fixture at Habitat for Humanity for only $65,,but by the time I could convince my friend how great it would be spray painted in white or tourquise or orange,,,,,it went back to get it for her and it was gone.


I saw these fantastic wire chairs at Home Sense,,,,,amazingly a couple days later they were STILL there. ??  Only $49 each.  Why someone hasn't scooped these babies up by now is a mystery to me.


BB Bargoons never ceases to disappoint.  Always in-style and affordable finds.  LOVE this wire pendant lights and wish I had a place to use them right now.


I discovered this gorgeous, stunning, heritage style lighting collection - its handcrafted by an artisan (second generation) just north of Toronto.  I'll be writing more about this in an upcoming post.

Installing the series six custom framed botanicals in a little girls room.


Spotted these at Chapter's and had to take note.  Surprisingly real looking, think they'll be perfect for the same little girls room (above) who's mother has asked me where she can find good looking but 'faux' flowers.  She's not into real flowers, every week, for her entire home...


Driftwood on a stick.   This photo will be an example of what I'm going to ask my BF to make for me with my collection of various things like driftwood, large shells, horns etc.. If I can show him a photo, then he can't say it can't be done. ; )


So now with my camera unloaded, I'm off to start another week of site visits and sourcing!


All Photos:  Carol Reed


Thursday, April 15, 2010

From Shoe Box to Gallery Wall


Last August I was planning and sourcing artwork with a client for her 3 story mid-town condo.  We had recently completed a top to bottom reno of the home (orginally built in 1980) and now it was time to focus on artwork and finishing touches.   One of the unique things about this condo was that it was 3 stories, so it had a tall staircase wall that led to a 3rd floor roof top deck.  This stairwell had a big tall blank wall and was flooded with tons of natural daylight.   One of the biggest challenges in sourcing artwork for this home was that there wasn't really a whole lotta wall space!  This stairwell actually presented one of the few places where we could hang some art.   My client had always wanted a gallery wall of black and white photographs........ and I thought this would be an ideal spot (since we didn't have many other options).  We were hanging original paintings in the living room and kitchen area so this staircase wall on the second level was a perfect spot for personal photos. 


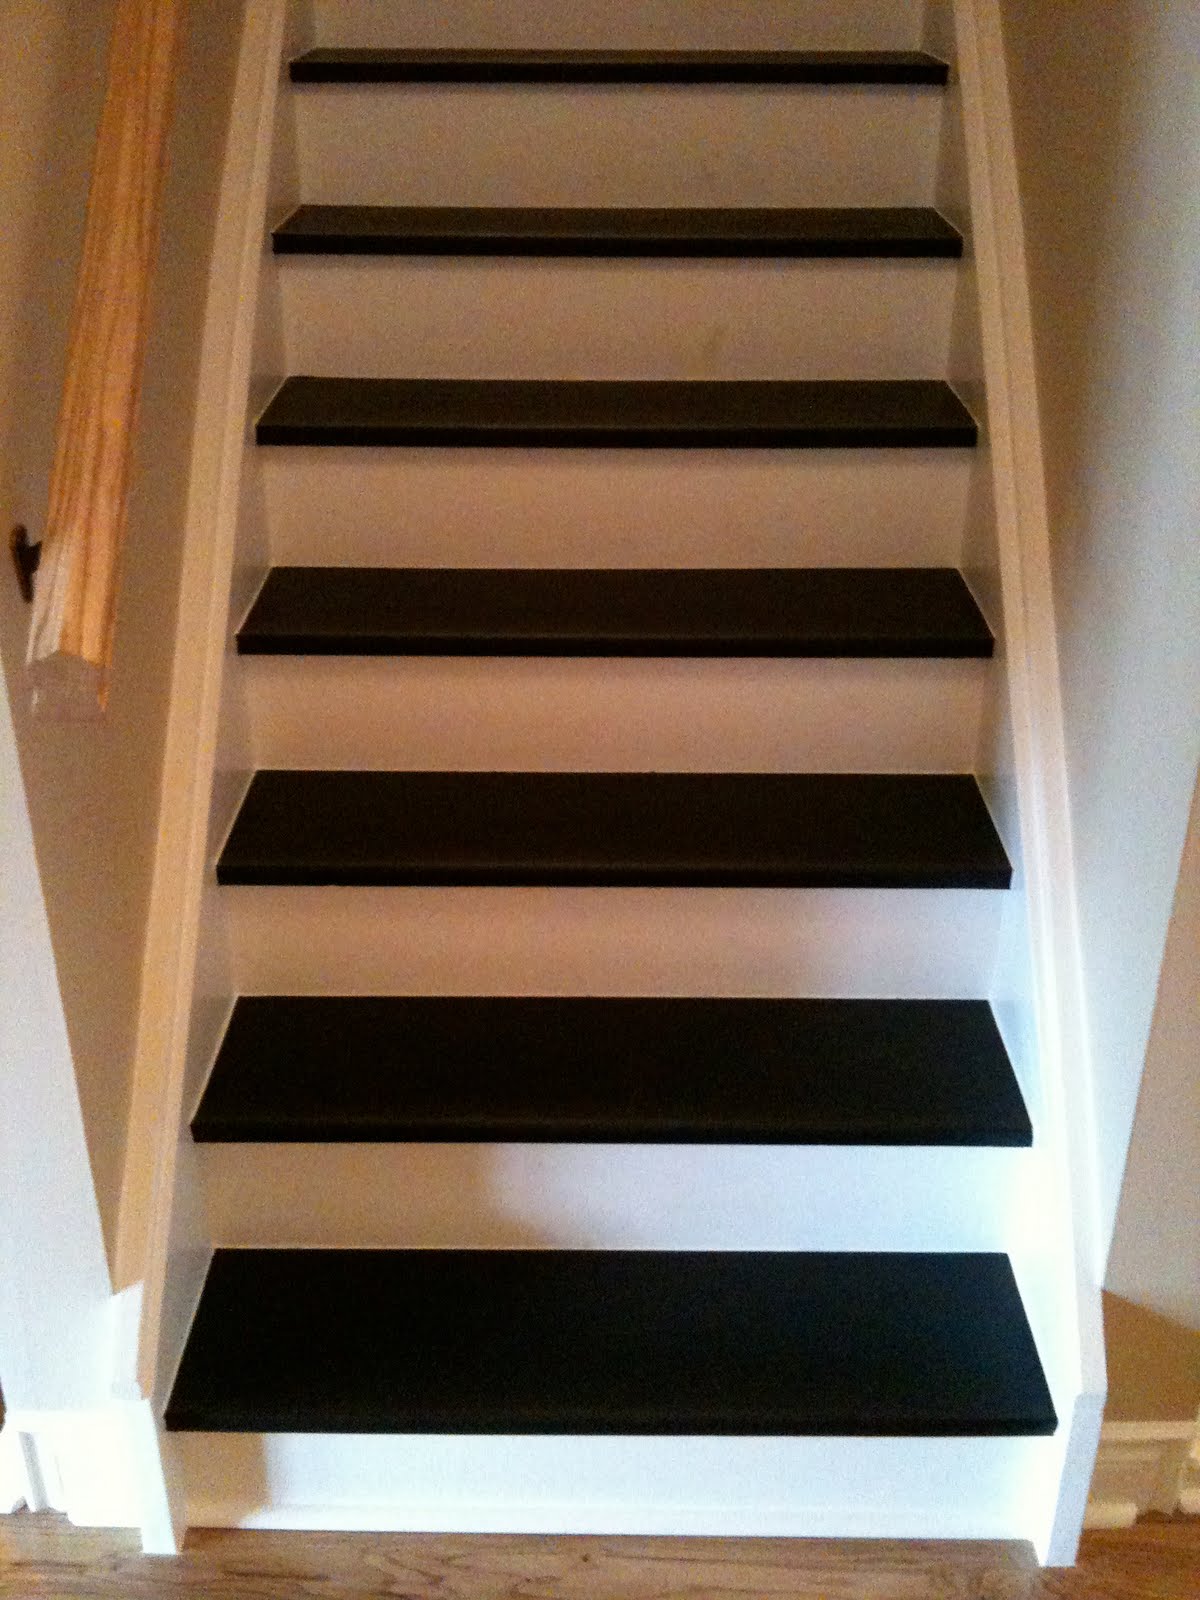
This is a view of the staircase as seen from the second floor hallway looking up to the landing which leads to a 3rd floor servery and rooftop deck.  The entire condo is painted in a soft warm white and during the reno I had gorgeous wide plank, natural antique ash floors installed as well as custom treads and risers made for the staircase.


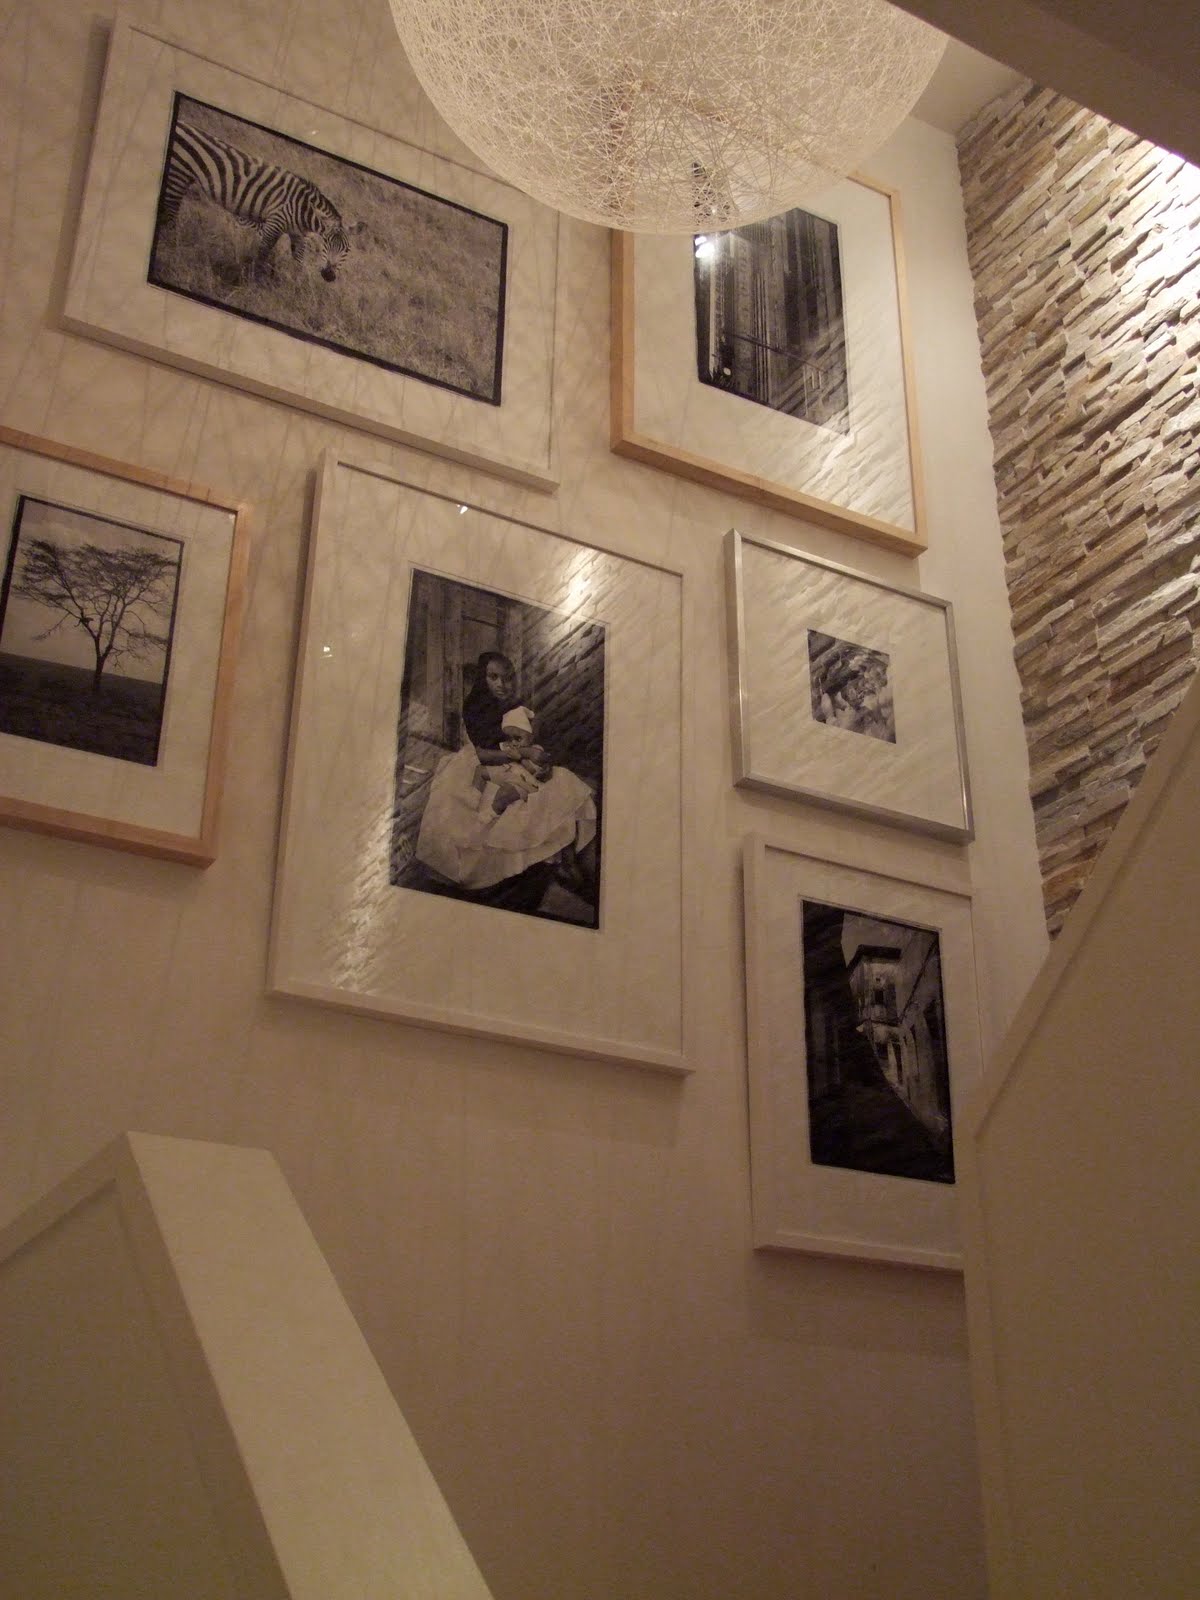
This is a view from up on the third level - the Mooi Random light fixture was one of the first pieces of lighting selected for the home.  I had envisioned it here from the very first time I visited the space, its such a perfect spot for this oversized but simple modern fixture.  The stringlike shade casts a wonderful pattern of light, the stairwell almost doesn't need anything else because the fixture alone makes such a statement.  The long wall is clad with a thin stone veneer which adds amazing texture, colour and an organic element to the space - it makes a wonderful transition to the outdoor lving space beyond...

While we were scouring galleries for canvases and other pieces of art, my client was continually drawn to black & white photos that we saw at the various galleries.  As tempted as she was to purchase some, I convinced her to take some time to dig thru her own photos first, I'd much prefer to use photos that had personal meaning to her.  Afterall, she had travelled extensively, including Africa, Australia, Italy, France, Germany, Amserdam, London, New York, Paris,,,,,,I knew she had loads of photos that were stashed away in boxes.

So a few weeks later she had gone thru her storage bins and dug out boxes and albums full of her travel photos.  She had hundreds of spectacular photos from all over the world.  I was in shock when I saw how many she had, and that she had had these treasures hidden away for all these years.  I was also pretty envious, I mean all I have to show from my personal travel photos are pictures of flowers taken in my own yard!  My task now was to weed thru them all and figure out which photos we'd use on the walls.  There were hundreds of shots like these....


These two are examples of what I had to chose from.  Can you believe these had been sitting in boxes for years!  I immediately forbid her from ever buying a single mass produced photo or print for the rest of her life.  The 'Girl with Baby' was instantly my favorite and it also was one of my clients most memorable, for me it was an awesome experience just looking thru all her photos, so many spectacular shots of landscapes, animals, buildings, I had an impossible time selecting just a handful.  I focused on photos that she already had in black in white or that I thought would translate well to b&w,,,I wanted images with strong lines and silhouttes, images that would have lots of graphic contrast because they would be viewed from up high and down low I wanted them to be viewable from various distances.   So I weeded thru an narrowed the selections down, 


I was drawn to all of these photos from Africa so I arranged them together to see how they looked and I just loved how well they worked in a grouping, there was a nice balance of light and dark.

And then I selected this group of photos taken in New York City....


All the photos I selected were taken on black and white film originally, not digital, you can see the film rebate edge on these 4" x 6" prints, which is pretty unique as I don't think there are many labs around that still do this.  Since there were no digital files or negatives to work with,  I scanned the prints into my computer so I could play around with the groupings easily.   After this excercise I ended up with a final group of African and New York images, I loved the contrast of pairing the primitive images with the urban.

Next I took the original b&w 4x6 prints to Kevin at Elevator Digital, (the masters of photo imaging!) and told him what I wanted to do.  He checked out the images and thought they were all really good quality shots, he would need to scan each one of them with a super high resolution scanner in order to make enlarged prints.  He also advised me on the sizes I should plan for with respect to maintaining the quality of the image and for best display size - he showed me examples of similar size prints in their gallery so I got a good idea of what the true scale would be like in person.   So, with the thumbs up from Kevin - all I had to do was tell him which ones I wanted and exactly what size to print them.  Back to my drawing board, er, computer...

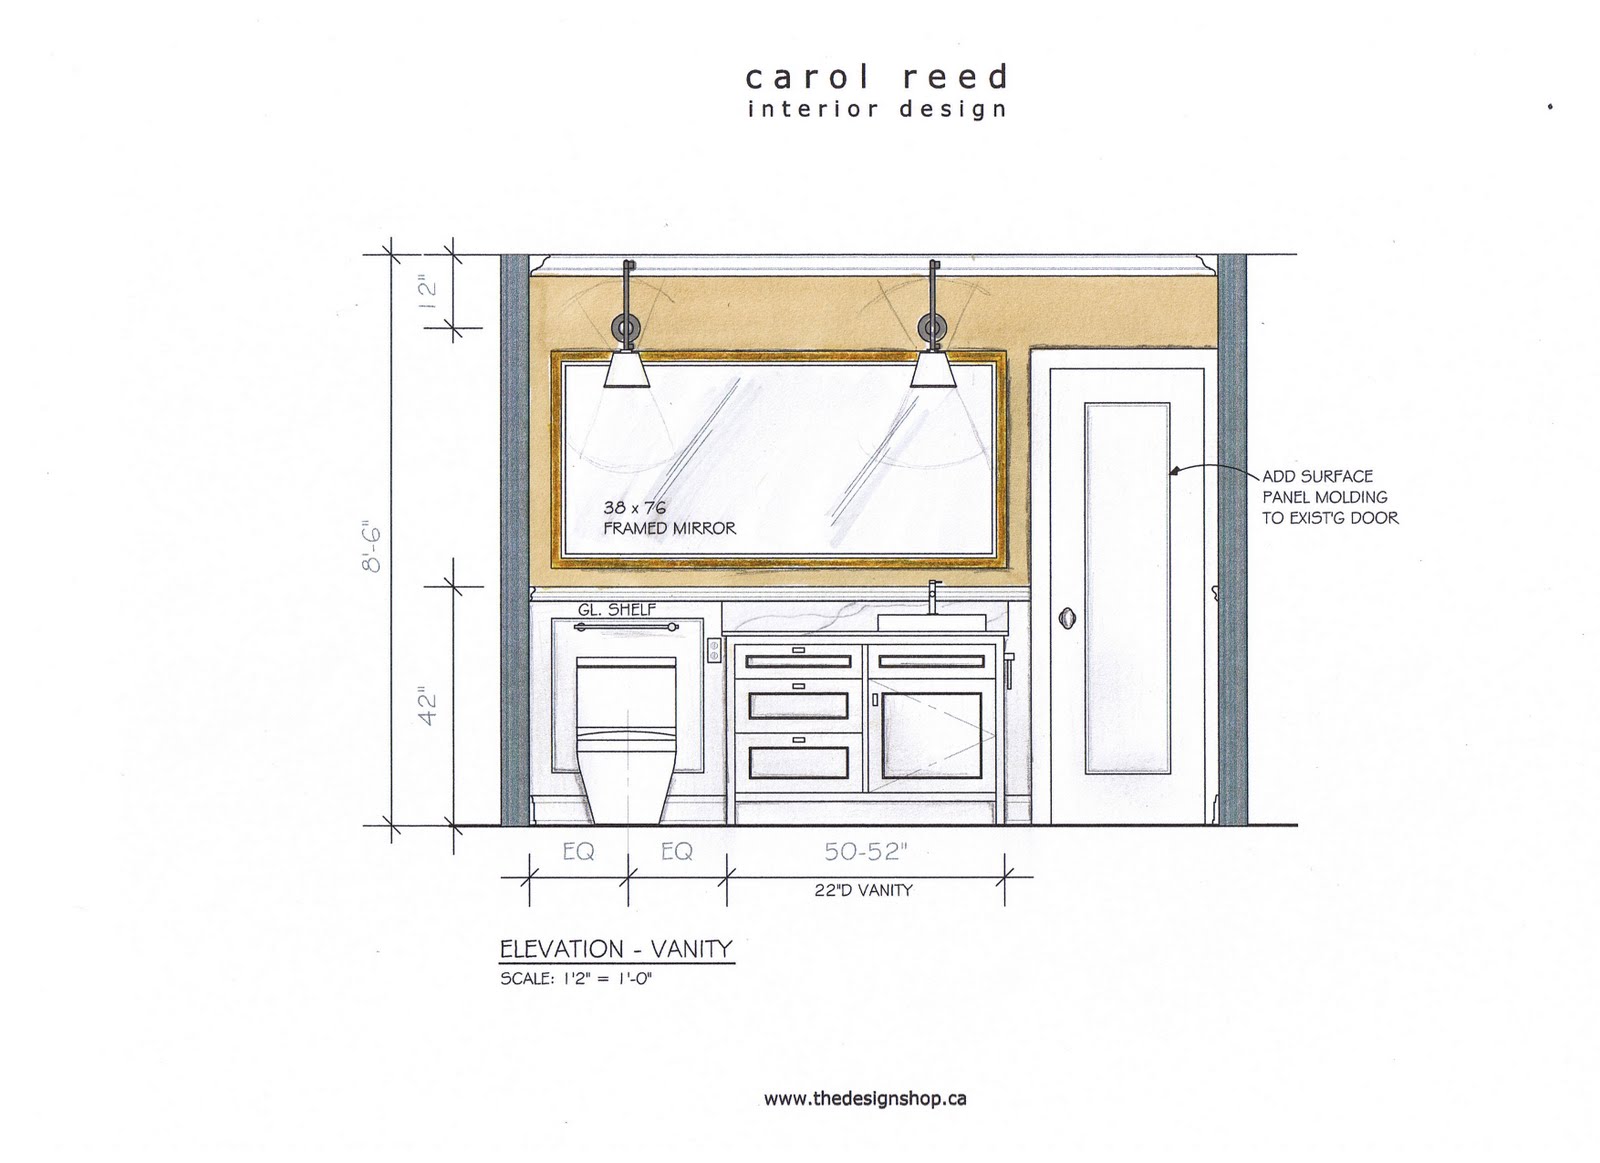
I returned to my cad drawings of the condo and drew up an elevation of the stairwell wall.  Then I just played with various sizes starting with the largest photo in the middle and working around it.  This helped me determine how many photos I could fit on the wall based on the size of photos I wanted to use.


Next I prepared a mock-up of the grouping by importing an image of the elevation into Power Point (or you could use Numbers or Photo Shop) and I simply placed the actual photo images on top of the image of my line drawing, this allowed me to enlarge the images up to the size I needed and to do it to scale.  I intentionally planned for a couple of future additions and left two of the frames blank.


Several weeks later the framed photos were delivered to the house,,,,where they sat here on the landing for quite some time waiting for me and my picture hanger to install them!  


Finally, installation day.  After the first two went up,,,,,I wished that I had ordered all the frames in white, I loved this look. But I had chosen to do a combination of white and natural birch frames so 2 of the 5 were in a wood finish. Of course after all the frames were hung I was completely happy with the mix of frame colours and had no regrets about that decision.


After the first photo, Girl with Baby was hung, it was used as a reference for locating where all the rest of the frames where to be hung, the entire grouping took only took about 1/2 an hour to hang (it actually took longer to set up the ladder and get the tools ready).  I used a typical spacing of 4" between all photos and each frame was either aligned or centered off another.  I left some blank space for other photos and frame styles or objects to be mixed in in the future.  But instantly after seeing the wall at this stage the homeowner grabbed a silver framed photo from the guest bathroom (its actually a flower photo that i had taken last year) and wanted to add it to the wall.  By pure co-incidence, it fit perfectly in the grouping so its going to stay but we'll switch out the photo for another one from her travels.


The completed gallery wall.


Here you may recognize the photo of Radio City Music hall in NYC,,,,I also used this same photo in Brian's Condo (jumbo size), it has such strong lines and an incredible depth in its range of greys.  Brian is a friend of this client who took the photo and a big fan of Radio City Music Hall so when he saw this photo in my files he the thought it would be a good fit for his place - now we're calling it a 'limited edition print', only 2 in existence!  In his place, I had it enlarged to over 6' tall and printed on canvas, you can read more about that here and see a sneak peek here

From a box of 4" x 6" prints, we were able to produce a few custom framed archival quality fibre murals (and by 'we' I mean Kevin), and create a beautiful and highly personal gallery wall.   I especially love the fact that the frame rebate (black border) that was around the original prints was maintained which I think gives the photos such an artistic quality.  Now,,,,,,,I have the overwhelming urge to book an exotic vacation.....


(Once again it was late in the evening when I took all of the above after photos so I apologies for the poor quality.)


All Photos:  Carol Reed

Monday, April 12, 2010

Fulfill your Dreams

Fulfill your dreams with HGTV dream homes

Home and Garden Television or Home and Garden Television, comes up each year with their enthralling home ideas that are built along the patoral locations. Like every year, it will also not disappoint this season. This company is known to build houses in jaw dropping locales, which is their unique selling point.

Hgtv Dream House: Dream Room

Until now, it has selected places like Colorado, Winter Park, Wyoming, and Jackson Hole. This year also, HGTV is planning to cast their spell in California’s wine country- Sonoma. This project will be one of the most extravagant projects ever and will give the contemporaries a run for their money.

Hgtv Dream House: Dream House

The homes by HGTV will surely captivate your senses as you can imagine lush green fields that are stretched over rolling valleys and are enough to cast their spell on your soul. Nevertheless, this is only a small part of the entire project. All the dwellings will be based on the tradition of Victorian farmhouse, capturing the true essence of traditional farm lifestyle along side meeting the luxuries of a royal experience. The entire project will create a high level of impression on every individual.

Hgtv Dream House: Another Dream House

They focus on every minute detail while building a house and each of their homes is like a hallmark. For the house, natural wood floors are used which are used after trimming and wainscoting. With such beautiful creation, this house will be a sign of great artisanship.

Hgtv Dream House: View from Dream house

With three-bedroom build on an area of 3,600 square foot along with three and a half bathroom, all the dwellings from HGTV are signs of masterpiece. Spacious and lavish, you will get all the amenities and facilities that are required for any dream house.

Friday, April 9, 2010

Before & After: E-Design Bathroom Project


I received a wonderful surprise in my inbox this week from a client who I had done some work for last September.  Much to my excitement, she had emailed me some 'After' photos!!   I love to see photo updates from my clients, but these particular photos were exceptionally exciting.   This time, this wasn't the usual full-service design project where I was involved from beginning to end, spending much of my time on site and seeing the progress along the way etc..,,,,,,in fact it was quite the opposite -  this client came to me thru my e-design website, thedesignshop.ca.  Which means I've never met this client in person or ever stepped foot in her house, although I feel like I have.   So I was beyond thrilled to see this bathroom transformation thru the photos she sent me. (wait til you see the 'befores'!!)

thedesignshop.ca is a website I launched a little less than one year ago - its an affordable and accessible way to receive a comprehensive design plan, prepared by a professional Interior Designer then delivered right to your in-box.  The entire process takes about 3 - 4 weeks and is suitable for those who live outside the Toronto area and/or those seeking design advice but are willing to do some of leg work themselves.  In this case, the homeowner ordered a Bathroom Redesign for the main bathroom in her victorian rowhouse located in a historical neighborhood in Toronto.  When she ordered the e-design service, she emailed me a site measure of her bathroom, photos, and all of her requirements.  In return I asked her to complete detailed surveys relating to the house, her lifestyle, and her preferences and then she sent them all back to me along with a few inspiration photos of bathrooms or elements that she was drawn to.  With all that information in hand,,,,,I was able to re-design her bathroom and deliver a comprehensive design plan to her complete with all the relevant information she would need to purchase all the products and hire a contractor to build her new bathroom.   After sending her the completed e-design package last fall, I knew I had hit the target when she replied telling me how happy she was "when i opened up the attachment and immediately saw the moravian star fixture I knew you had captured my idea of a dream bathroom".  Soon afterwards she sent me an update saying she had hired a contractor and they were looking forward to starting the reno in January.  Aside from one question about the size of the vanity drawers (her contractor thought they would be too big?) I havn't heard from her again...............until this week.  And - its all done!

But before I show you the after's,,,,you really need to see the before's to appreciate what a dramatic transformation this was.


The Before's......

Sink Vanity with hollywood lights


Tub/Shower enclosure with cedar clad walls


Wall to the left of the window with brick chimney wall and cedar cladding

The last time the bathroom was 'done' was in the early 80's, and with all that cedar cladding and the hollywood lights, the homeowner described this style as 'Sauna Chic'.  It was the main bathroom in the house for her and her husband and two adult sons, their only other bathroom was a 2pc in the basement.   The great features about the room were that it had good high ceilings and a wonderful big window with  a gorgeous view of a leafy backyard garden.  


The Inspiration.....

A collection of images that illustrate various elements and design details to be used as reference for the new bathroom design.


 She loved the charming timeless character and warm colours of this traditional bathroom.  I proposed either a panel moulding wainscott detail or a painted beadboard wainscott which would work equally as well.


She loved the understated and simple lines of this classically inspired bathroom with its contemporary styled plumbing fixtures and furniture style vanity. Also high on her wish list were clean lined vessel sinks and single lever faucets.


She loved all the traditional details here but wanted something warmer in colour for the walls. 


The Design Plans....
First I emailed her two preliminary layout options for incorporating a separate tub and shower which was the main objective, but the toilet and vanity locations remained the same.  She decided to go with a drop-in style tub with a tub deck and skirted front.  So the rest of the design plans were developed from there.


The final floor plan.


This is the Elevation at the window wall showing the new tub surround and seperate shower.  The tub selection was key as we needed to find one that was low enough to be installed under the existing window and one that had simple clean lines.  This new model from Duravit fit the bill perfectly!


This side elevation shows the half wall with glass between the tub and shower.  The paneled wainscotting and crown moulding added that traditional character to the room.


I had provided her with 3 options for the vanity wall, one option had a smaller mirror over a centre sink with scones on either side and a storage cabinet over the toilet, she had a hard time deciding as she really liked both, but in the end, she opted for this option with the large mirror and lighting above. 

In addition to all the drawings above, I also provided her with a list and photos of all recommended plumbing fixtures, light fixtures, hardware, mouldings, tile, window treatments and accessory selections along with sources and approximate costs.  You can see more images of this e-design package on thedesignshop.ca website sample gallery here.


The After's.....

The email I received from my client this week along with the 'after' photos was quite a surprise.  I received a short note from her along with some photos.  It was eloquent, and precise just like I imagine she is. "my bathroom has been complete for two weeks and I must say its the most beautiful bathroom I've ever seen. When the mirror was put up I had tears in my eyes..."


I proposed both a vessel style sink option and an undercounter mount,,,,,along with two faucet options of either a single lever or widespread.  I was surprised to see she didn't go with the vessel style sink, but I think this looks great too!


I also provided several ligh fixture options.  Often this decision is determined by what's available for when you need it, especially when you need two of them.  You can see on the design board (2nd photo from top) that not everything illustrated there is seen in the after photos, however, the final choices made were from alternate options provided in the design package, so there is always flexibility of choice offered to the client.


Well what can I say but - so beautiful!  Even without any professional styling or photography, the bathroom looks stunning.  These photos were taken just the other day and the bathroom has only been complete for 2 weeks so I imagine she'll be adding a few more accessories or artwork in the future.  I can't begin to describe how impressed I am with the results and congratulate her on doing such a stellar job!!   To realize what this homeowner accomplished - implementing this project on her own with a set of plans and written instructions is inspiring.  I think these images speak volumes to the importance and value of investing in a good design plan, but then again, this client is an Academic by profession so she was wise enough to recognize that! ; )

Since this house is located in Toronto, I'm making plans to visit in person before the end of next month so I can take some of my own after photos.  I'm looking forward to meeting this client in person and she's looking foward to relaxing for a bit, pampering herself in her new bathroom and getting ready to start her next e-design renovation project......the kitchen!